
POC / Shell Texturing
Inspiration
acerola's youtube video How Are Games Rendering Fur?
How it works
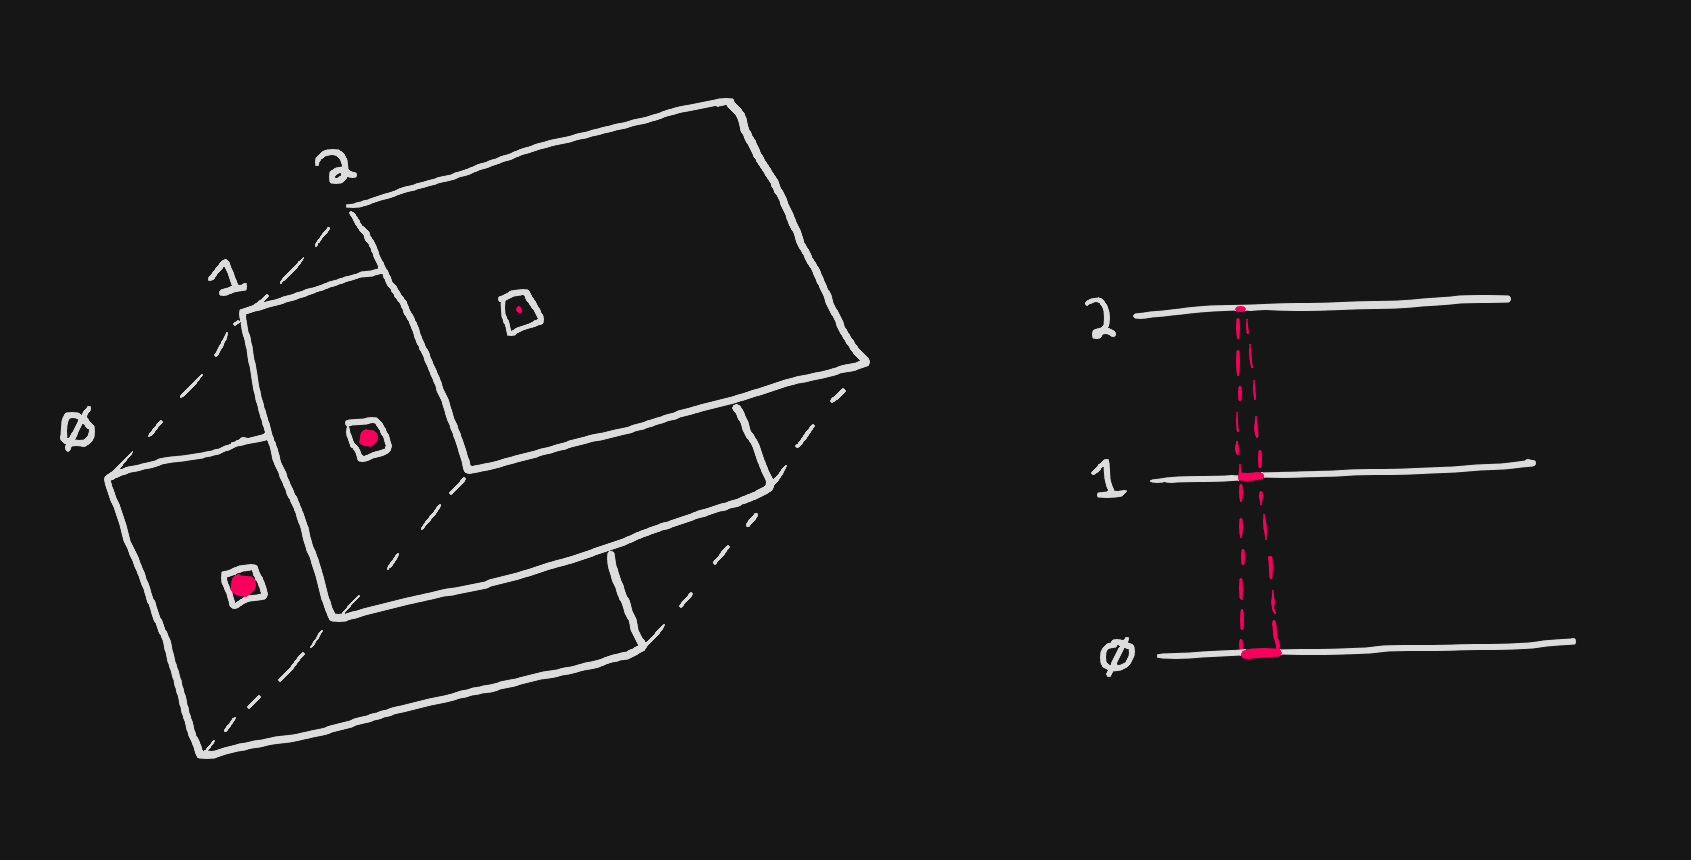
The basic idea behind shell texturing is:
- Render multiple mesh instances, offsetting each vertex by the normal based on the instance count and shell spacing. For example:
vec3 actualPosition = vertexPosition + normal * instanceIndex * shellSpacing - Output color where the current pixel is inside of the hair, otherwise discard the pixel. For example:
which ends up looking like this:const float divisions = 10.0; vec2 localUV = fract(uv * divisions) * 2.0 - 1.0; float p = float(instanceIndex) / float(instanceCount) // compute distance to cone float d = length(localUV - 0.5) - (1.0 - p); // test if inside the cone if (d < 0.0) { gl_FragColor = vec4(1.0); } else { discard; }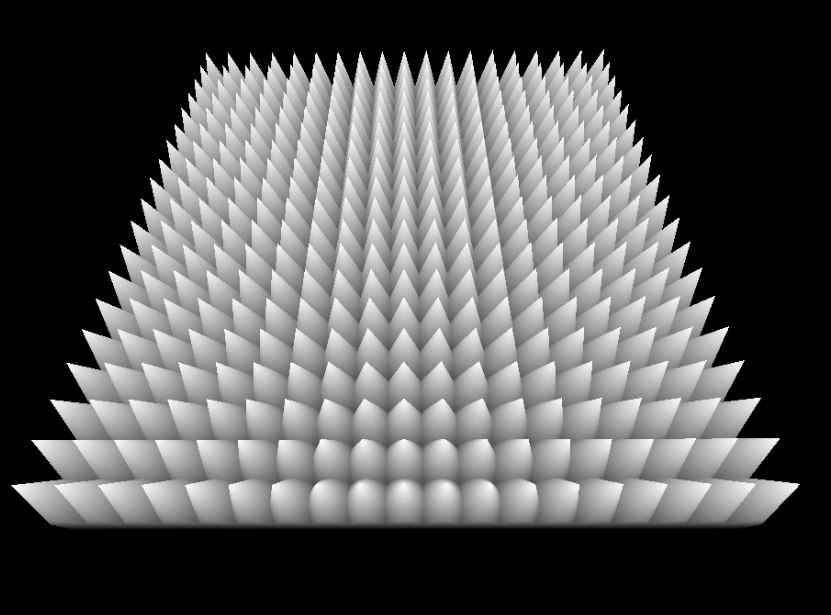
Demo
shell count
shell spacing
shell subdivisions
mesh

This demo requires WebGPU - in other words, you should open this page in Chrome or Edge.
source: shell-texturing.js
Downsides
-
Viewing the slices at the wrong angles cause major artifacting. This can be avoided on geometry likes planes, but complex meshes might be hard to hide the artifacts without further effort.
-
Mesh UVs can cause discontinuities at the seams for programatically generated textures. One potential solve for this is using the normal and computing the UV from that, depending on the mesh this might also contain artifacts: see the
spheremesh above when viewed from the top.vec3 basisUp = vec3(0.0, 1.0, 0.0); // swap the up vector if our normal is (0, 1, 0) - assuming y-up if (abs(dot(normal, basisUp)) >= 0.999) { basisUp = vec3f(1.0, 0.0, 0.0); } vec3 right = cross(normal, basisUp); vec3 up = cross(forward, right); vec2 uv = vec2( dot(right, uvw), dot(up, uvw), );